


Camera Trapping
What is camera trapping?
No it's not setting snares to catch cameras but a name given to method of using a sensor to trigger an unattended camera to take a photo of an animal, bird or reptile.
Advantages
The advantage of this process over using a trail camera is that you can use a high quality digital camera to get high quality colour images. With the use of additional flashes you can also get good quality colour images in the dark. It has one good advantage as it means that you don't have to sit in a hide for hour upon hour waiting for the subject to appear. For example when I photographed a Pine Marten in Scotland it appeared at different times during the night. On the first night the Pine Marten came at 20.30pm and returned at 2.35am in the morning, the next night it came just on one visit at 1.50am, the night after that he didn't make an appearance at all and on the last night he was there at 21.50pm and again at 4.28am.
Disadvantages
Unlike sitting in a hide where you have complete control of when to take the shot and the ability to re-compose the shot on the fly. With camera trapping you don't have that ability. You have to compose your shot in advance and hope that the subject is in the shot and looking at the camera when the sensor trips and fires the shutter.
Equipment
You will need a few bits of extra kit and gear to achieve this which I will explain below.
You will need some sort of waterproof housing to protect your camera from the elements to keep it dry. |
You will need some kind of sensor that from the movement or heat from the animal will trigger the shutter on your camera. |
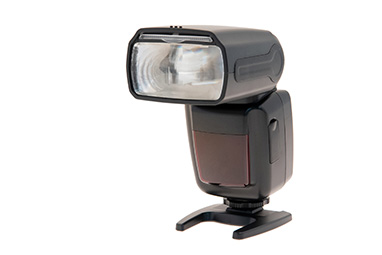
If you are photographing nocturnal animals such as Pine Martens, Badgers or Hedgehogs you will need some flashes to light the scene. |
To communicate between the sensor and the camera and the camera with the flashes a set of wireless transmitters and receivers. |
Alternatively you can use a cable system to communicate between the sensor and the camera and the camera with the flashes |
A Camera Trigger cable that fits your make of camera. |


Whether to choose Wired or Wireless
Pros |
Cons |
|
Wireless |
|
|
Wired |
|
|
My personal preference is to use wireless as it is a lot less messy, more discreet and convenient to set up but it does need batteries which on a long camera trapping stint will need replacing at some point.
Pine Marten Photos

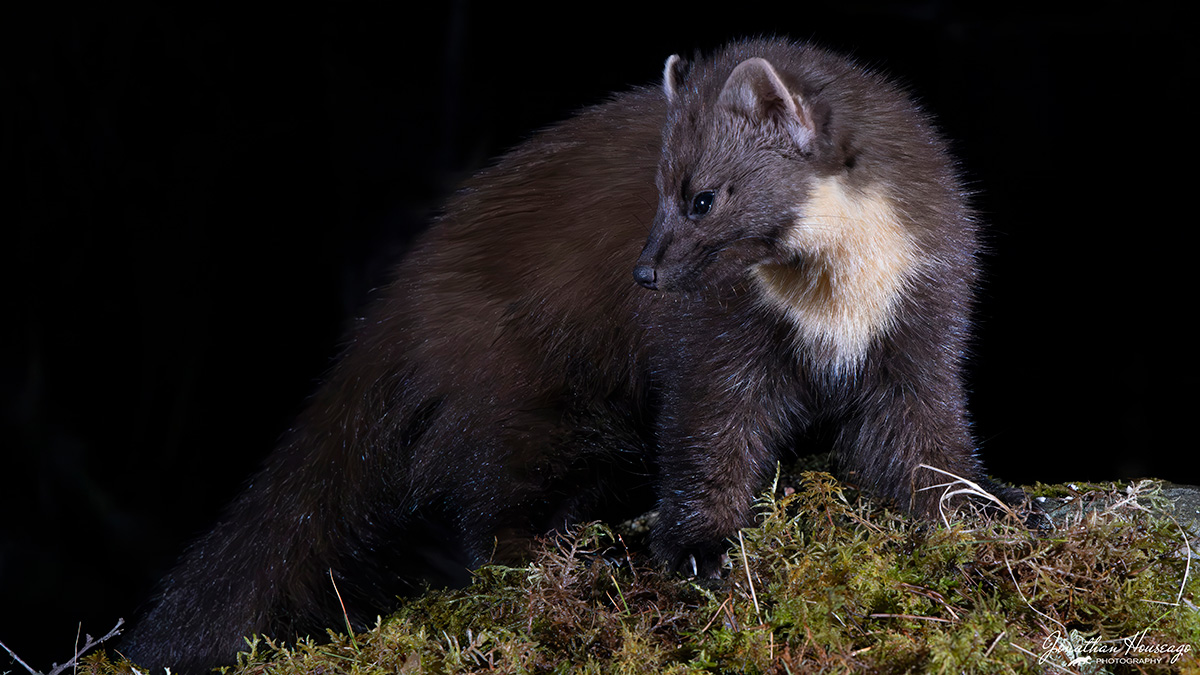
This was my first attempt at camera trapping and I was pleasantly surprised as to how well it went and with the end photographs. I was very fortunate that the cottage I was staying at in Scotland was close to some woods. On my first night there I put some hazel nuts out on the picnic table in the garden and placed a trail camera out at the end of the table. This is what I saw when I reviewed the images the next morning:
I just had to set up the camera trap to see if I could get some photos. You can see the set up for the pine marten photos in the photos below.


To make the photos nicer than just the Pine Marten on a picnic table I got a few rocks and moss and made a suitable looking scene at the end of the table which also gave some where to hide the hazel nuts as I didn't wont them in the photo. The camera housing was attached to a camera tripod and the PIR sensor was on a small tripod. I used two flashes on a couple of folding stands with a rock on each to stop any wind blowing them over. As you can see in the photo to keep the flashes dry I used a couple of drawstring plastic bags. I have since invested in some waterproof flash housings which you can see in the hedgehog setup photos below.
Below is the footage from the trail cam from the first visit. Unfortunately it was a cold night and there was a bit of condensation on the lens but you can see the reaction of the Pine Marten. It was very wary initially from the first few flashes and scuttled off for a short while but then came back and soon got used to the flashes going off. I had set the PIR sensor to take a photo every 10 seconds. I could have set it for a shorter duration but I didn't want to scare the Pine Marten with too many flashes.
Hedgehog Photos
Here are two photos that I took of an hedgehog taken in our garden using the camera trap system.


In the picture below you can see the setup that I used to capture these two images. The first thing I had to work out was where I would expect your subject to come from. This is all about knowing your field craft. In this case I knew that there was a Hedgehog sleeping in a nest box at the end of the path and that it would usually be coming towards the camera early in the evening when it woke up from its daytime slumbers. You also have to consider the composition of the photo and what will be in the background. In this case I wanted to get the hedgehog against some flowers. As you can see the PIR sensor was pointing in the direction of where the hedgehog was expected to come from and the flaps on the sensor were deployed to create a narrow sensor area. I used two flashes set at angle of @90º to each other. Both flashes had their diffuser on to try a create a more diffused light.
To create a more intimate shot I wanted the camera to be as low as possible to the ground therefore the camera housing was not on a tripod but screwed on to a piece of recycled plastic Stokbord which I had left over from making some hedgehog feeding stations. It kept it very stable and low to the ground and by putting a small piece of wood under one end I could angle the camera slightly downwards. You will notice that there is a Trail camera in position. I like to use one of these to record the video of the animals reaction to the flashes. In this case the flashes didn't seem to affect the hedgehogs too much which is probably because they don't have very good eye sight.

Camera Settings
These are very important and will make big difference in getting successful photos. I always photograph in 'Manual' mode on the camera as this gives me the best control of all the settings. I use a Canon R5 camera with a RF24-105mm F4 L IS USM lens. I always shoot in RAW as this gives me the ability to adjust any exposure problems in post processing.
Focus: I generally use manual focus. If you are using a baited scene then you know where the subject will be and you can set your focus on that area. This worked well for the Pine Marten photos. With the Hedgehog setup I again used manual and I had to guess where the hedgehog would be and focused at that point and set the PIR sensor to trigger at that distance.
Shutter speed: If I am using flashes then I use 200s.
Aperture: You need an aperture that will give you a reasonable depth of field. I generally use F11 which seems to work OK and gives an ISO of 12800 which is acceptable and not noisy.
ISO: I always use 'Auto ISO as it will always give the correct exposure to the light levels.
Flash settings
I usually set all my flashes to Manual mode with the first flash set to 1/16 power and the second flash to 1/32 power. Once I have the setup all arranged I wait until it is fully dark and take some test shots. Just to see what the lighting is like and make any adjustments. Either I will move the flashes back or forwards or occasionally adjust the power level of either of the two flashes to make sure that I have the correct exposure. You need to make sure that there no foliage in the way or could be blown into the way of the flash to cause any shadows.
The Gear that I use
Most of the gear that I use comes from Camtraptions Ltd. They produce some really brilliant camera trapping gear. It all works really seamlessly together and is very well thought out and designed.
- 1 x Camtraptions Wireless PIR Motion Sensor V4
- Camtraptions Wireless Triggers V2 - 2 x Transmitters & 4 x Receivers
- 3 x Camtraptions Z PRO Camera Trap Flashes
- 1 x Camtraptions Camera Housing with heated glass
- 3 x Camtraptions Flash Housings
- 1 N3 Canon shutter release cable
Camtraptions Wireless setup
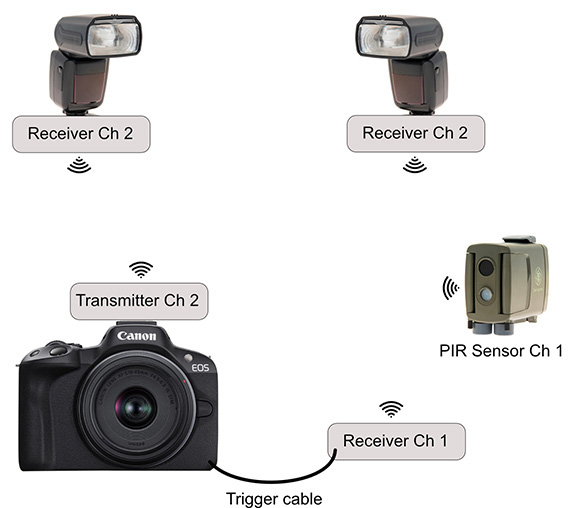 When using the Camtraptions wireless transmitters and receivers with the PIR Motion sensor, camera and flashes you have to set them up in a specific way using two different wireless channels.
Firstly you will need to set the PIR Motion Sensor to channel 1 (which is its default channel). Then set the camera receiver to channel 1. The camera receiver is then connected to the cameras remote terminal using a wired shutter release cable.
The two flash receivers then need to be set to channel 2 and then the flashes are connected to the hot-shoe connectors on the top of each of the receivers. The camera transmitter which is attached to the camera via the hot-shoe attachment on the top of the camera then needs to be set to channel 2.
You could use other channel numbers other than 1 & 2. it doesn't matter which ones you use as long as you are using two different channels.
Once this is all set when the PIR Motion Sensor is triggered a wireless connection is made to the camera receiver which using the shutter release cable triggers the camera shutter. As the camera shutter is triggered the transmitter connected to the cameras hot-shoe mount sends a wireless signal to fire the flashes.
There is a wealth of more information about the Camtraptions gear on their website. They even produce a brilliant free 60 page 'Camera Trap Photography Ebook' which is packed with expert advice on all aspects of camera trapping. Well worth downloading and reading.